Section 3:
Production & Documentation
PRODUCTION CHART:
Before I begin development of my game, I will make a production chart to keep schedule of the various stages of development.
Though I had used a production chart during the development of Ijiraq, I quickly fell out of lockstep with it and began working in an impromptu scheme that I scarcely elaborated nor changed the production chart to reflect the new production schedule. This time, however, I have thoroughly organized my production schedule.

The dates in this chart have been cut out; each column represents a week, dating from March 28th to the deadline on April 12th. I shall be working through the various tasks laid out in descending order.
Column 1: 28th March - 4th April
Column 2: 4th April - 11th April
Column 3: 11th April - 18th April
Column 4: 18th April - 25th April
Column 5: 25th April - 2nd May
Column 6: 2nd April - 9th May
Column 7: 9th April - 12th May.
28th March - 4th April
Player Character
28th March
The first method of implementing player controls was through the use of the Car behaviour applied to a sprite, a behaviour which I had previously toyed with during the Kobayashi Maru Tank Game that we had done at the very beginning of our course. I had also applied the Physics behaviour to said sprite, as this would add gravity to the sprite.
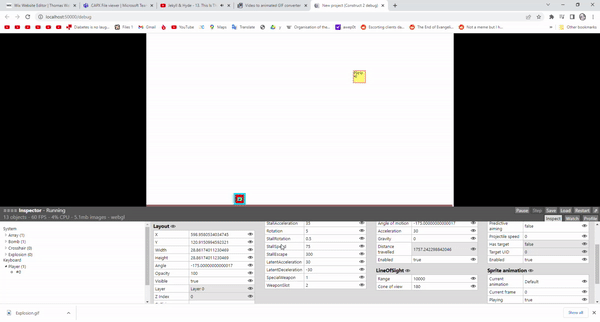
However, the instant that I would begin moving, the gravity would lose its hold over the sprite. The moment that the sprite slowed to a standstill, gravity would kick in once more and the sprite would plummet. I was unable to figure out how this happened, even after analysing the event through the Debug Layout. I initially assumed that, due to the pull of gravity being halted by the change in acceleration, that gravity was simply a downwards acceleration. However, it turns out that the angle of motion is not affected throughout this process.

Therefore, I had to do away with the Physics behaviour. Whilst researching this issue online, I came across a forum where someone had a similar issue. The common consensus was that using the Physics behaviour strictly for gravity use was overkill; it was suggested that the author of the forum use the 'Platformer' behaviour instead. I assigned the Platformer to behaviour, set the 'Standard Controls' setting to false (essentially meaning that the controls for the Platformer sprite were disabled unless I simulated them through events); and lo and behold, the latent gravity applied with the Platformer behaviour was functional even as the sprite began to move.
However, from there, I ran into a problem with the Car behaviour that I used for the sprite's movement. There is a setting called 'Drift Recover', described within Construct 2 as 'the rate the angle of motion catches up with the object angle.' The lower the drift recovery value, the longer it takes for the angle of motion to catch up with the object angle, therefore creating the effect of drift.
However, for my intents and purposes, the drift recovery of the Car behaviour does not work. Setting drift recovery to 0 does prevent the angle of motion from catching up with the object angle; it does not, however, prevent the angle of motion from being moved. Upon turning 90 degrees in one direction or the other, the rotating sprite will drag the angle of motion with it, at which point the angle of motion will begin to turn normally.
Therefore, I had to opt for a different form of control. I replaced the Car behaviour with the 'Custom Movement' behaviour which, as the name suggests, allows you to program your own controls. One of the actions that this behaviour allows the user to perform is to accelerate a sprite in a certain direction. I set it to accelerate my sprite in the angle of 'Player.Angle'. This achieved a drifting effect, and the motion of the sprite was not affected by turning. The only way that the motion of the sprite was affected was by accelerating in another direction. When viewing this behaviour through the debugger, unlike the Car behaviour, it does not make note of the angle of motion, so I sadly cannot state what causes these controls to function differently than the Car behaviour.


However, as seen in the footage above, the player is incredibly floaty. They're more akin to a shuttle floating in the depths of space, fighting against their own momentum, a flight system that is utterly unacceptable for the arcade flight simulator I am trying to create. There is another action that allows you to set the speed of the object, but only on either the horizontal, vertical or overall axes. I managed to circumvent this by setting the angle of motion to the player's angle in a separate event, although this completely eliminated elements of drifting and acceleration. Drifting is a feature that the game can live without, but there being no element of speed is a complete no-go. Therefore, I would have to find yet another control scheme for the player aircraft.

The 'Bullet' behaviour is the final behaviour which I settled on. This behaviour actually made the Platform behaviour redundant, as Bullet also came with in-built gravity, but I would work on implementing it later. For the time being, I wanted to implement acceleration and deceleration. The hard part wasn't actually implementing acceleration and deceleration, though; it was the state in-between, the neutral state, which was the most challenging part to implement. Without accelerating or decelerating, the aircraft needs to hold itself at a stable airspeed, which means automatically accelerating or decelerating when above or below the aircraft's average speed.
This is was when the 'Else' condition came into play, a condition that I previously knew the existence of but never utilised. Any event with the Else condition as part of it will be triggered if the previous event is not running; in this instance, the player's acceleration will be set to -50 if the up arrow is not held down. However, due to a second Else condition following the previous, the player's acceleration will be set to 50 if the previous event is unable to be triggered.
I believe, but cannot be sure for certain, that this creates a chain of events to be followed as such:
Up Arrow held down: acceleration 100 > released over 200 speed: acceleration - 50 > released under 200 speed: acceleration 50
The final event of the chain, setting the acceleration to 50 if under 200 speed, is linked to the previous step in the chain; it will not trigger if the previous step itself does not attempt to trigger. Therefore, by holding down the up arrow the event chain would be reset. This is important, as without the Else condition being attached to the final step in the event chain, holding down the up key would not be able to increase the player's acceleration until they are above 200 speed, owing to the event involving the up key check being earlier on in the event sheet and thus having lower priority.
28/03/2023 - 20:03 PM: As of writing this, the observation I had made in regards to event priority brought me to an epiphany. Moving the up arrow check further down in the event sheet, past the speed checks used to stabilise the player's speed, would grant it higher priority and thus cause it to override said speed checks. This completely negates the use for the Else condition, allowing me to cut down on bloat.

29th March
The second element of player control I had to implement was a stall mechanic. Upon reaching a low enough airspeed, the player will begin to plummet to the earth unless they can build up enough speed to move again. Implementing this was easy enough. Upon reaching a low enough speed, the gravity would be set to a certain amount; else, the gravity would be set to zero.

However, the issue with this is that the speed of the bullet these events refer to is the overall speed. When the player reaches the gravity threshold and begins to descend, their speed increases; 'Set Gravity' is itself referred to as 'the new acceleration caused by gravity' in its description. What this means is, upon stalling, the player is given a great amount of acceleration which increases their overall speed at an unprecedented rate, causing them to easily leave the stall state. The player's handling is also completely uninhibited by the stall, only adding to the ease of getting out of this state whilst handicapping its effect as a punishment for poor speed management.

Therefore, there were two courses of action that I needed to undertake: one was to make the stall state harder to get out of; and two was to worsen the player's handling whilst in the stall state.

To this end, I added the first of many instance variables I planned to add to the player: 'Stall'. I implemented this instance variable as a means to alter the player's controls upon hitting the thresholds for entering or exiting the stall state. I originally added only the 'Stall = 1' sub-event to the rotation events, but the player's rotational speed was not affected when Stall was set to 1. This turns out to be because when using sub-events, the main event should not use actions. When left blank, the primary event will instead check for whether the next event in the sub-event chain is true. This meant that I had to incorporate an additional two events in order to incorporate the rotational slowdown upon triggering a stall. After the fact, I also applied these stall sub-events to the up arrow event in order to make accelerating harder when in a stall.

'Sub-events', Construct 2 Online Manual. Https://www.construct.net/en/construct-2/manuals/construct-2/project-primitives/events/sub-events


Once I was satisfied with these results, I translated all of the various values into instance variables to be stored within the player. I then converted their respective functions to use these instance variables in lieu of the static values previously assigned to them.

The reason that I did this was in preparation for creating the second playable aircraft later on in development. As previously stated, the values assigned to the player events were static-- unchanging. If I was to create a second aircraft, I would have to create a dozen events and sub-events to incorporate changes to stats like acceleration or turn speed depending on the aircraft that the player is piloting.
Instance variables, on the other hand, are malleable-- interchangeable. Instead of having to create a dozen events, puzzle over event order and priority, and relentlessly playtest, I can simply change the instance variables. This will cause the handling of the plane to change in suit. What I have accomplished, simply put, is a player control framework which I can alter to my will when the need arises.
Compared to what I had envisioned, a pseudo-realistic flight system with elements of drifting and a focus on energy management, the flight system that I had developed was fairly simple.
Player Weaponry
Unfortunately, a vital element required of the lock-on system I planned to implement was unavailable in the free version of Construct 2: families. Families in Construct 2 are groups that a variety of assets can be put into, and any events pertaining to these families will apply to all the assets within said family.
I planned to use this feature to categorize the enemies of the game into one group. This was essential for implementing the lock-on system, as it would allow the player to target any enemy within range. Without it, I'll need to implement targeting events for every enemy in the game, which would ravage the amount of events I have to develop my game. Therefore, sadly, lock-on missiles are unfeasible. This is a massive blow to me, and I am disappointed that I had not anticipated nor researched the further limitations of Construct 2 before beginning my work.
Therefore, in lieu of lock-on missiles, the special weapons will have to be made the primary weapons of my game, with guns as a secondary.
I decided that, as a long-range lock-on missile special weapon would also be impossible to create, was to begin work on the bomb weapon. As stated in the pre-production section of this document, the bomb is an incredibly simple weapon, and therefore it wouldn't be that hard to implement. I can achieve the bomb's physics by simply applying the Bullet behaviour and adding gravity so that it would travel in an arc. Where this got more complicated was when it came to implementing the bomb explosion and how it would damage enemies.

I added two new assets: a tiled background, to serve as a makeshift floor, and an explosion animation.
As previously stated, the explosion is not intended to cause damage by physical contact. Instead, as discussed during the pre-production stage of the document, I will be applying a Line-of-Sight behaviour to the explosion to detect adjacent entities and deal damage to them accordingly. I set the angle of the explosion to 0 degrees because when it is spawned by the bomb, the angle of the explosion upon spawning is linked with the angle of the bomb. This caused the explosion to be on a diagonal axis on creation.


The second weapon that I wanted to implement was the player's basic weapon: the aircraft's standard gun.
The introduction of the aircraft gun then necessitated the introduction of a weapon swap system.
At first, the presence of multiple weapons doesn't seem like an issue as I could simply bind multiple keys for the different weapons. However, If the player was to have access to both the aircraft gun and the bomb at the same time, this would heavily mitigate the challenge of the game. The player would be able to at once hold down the gun button, intercepting incoming missiles, whilst firing off bombs and causing massive damage at the same time. By restricting the player to one weapon or the other, this forces them to use their weapons tactically.
To implement this, I added two new variables to my game: the local variable 'WeaponSlot' and the global variable 'SpecialWeapon'. The former of these variables is used to determine which weapon the player is currently using, between their gun and their special weapon, whereas the latter is used to determine which special weapon the player has access to. I achieved this through the use of sub-events, just as I had done to create the stall effect documented earlier. However, whereas the event for WeaponSlot = 2 has actions attached to it, WeaponSlot = 1 splinters off into another sub-event chain to check the value of SpecialWeapon before initiating actions.

30th March
However, as seen in the footage above, the simultaneous use of the guns and special weaponry that I described can be achieved by double-tapping the Shift key the moment that the 1.0 second cooldown on the bombs is over.
Therefore, I had decided to scrap the weapon swap system entirely and allow the player to use both weapons at once, necessitating a slight overhaul of the controls. This would also necessitate a rebalance of the weapons. Thankfully, though, I had an idea on how to rebalance the weapons without having to drastically overhaul how they worked. This is where ammunition comes into frame.

Gun ammunition concept art, 30/03/2023
The sprites seen in the images and footage thus far has been in no way intended to represent the appearance of the sprites in the final game. The bullets fired by the player were coloured green strictly to be able to stand out. However, given the regenerating ammo mechanic and the sci-fi aesthetic of the player aircraft, reworking the bullets into being plasma rounds seemed to be a logical evolution of the concept.
Regenerating bullets aren't quite as immersive, are they?
Ammunition in games are effectively a limiter on how often you can use your weapons. When used well, it makes the player carefully consider their weapon usage due to the risk of using up all reserves of a tool that would prove useful later on. I initially debated having a strict ammo limit in this game, as the player has no means of refilling their ammunition; running out is effectively a game over. However, given the player's capabilities of using both guns and special weapons to monstrous effect, it is something I have to implement in order to balance weapon usage.
Then I realised: I don't have to make the player's ammunition truly limited. I could incorporate regenerating ammunition with a limit. This would limit how often the player is able to use their weaponry, solving the issue of spamming both guns and special weaponry to completely kill the difficulty of the game, whilst also circumventing the issue of the player running out of ammunition and being forced to kill themselves.
I will first test this concept using the player's gun.

I added in a new asset, a sprite called 'PlayerAmmoGun'. This sprite is UI designed to visually represent the amount of ammo that the player has left in their gun.
I then added two new instance variables to the player: 'GunAmmo' and 'GunAmmoCap', pertaining to the amount of ammunition that the player currently carries and the amount of ammunition that they are allowed to carry respectively. I then set it so that PlayerAmmoGun's animation frame was set to the value of GunAmmo every tick in order to accurately demonstrate the amount of ammo the player has left.


There was an issue that I faced when implementing this feature. When releasing the X key, there is a short delay before the ammunition of the gun begins to recharge. However, if the player fires and releases the X key again whilst the recharging process is underway, this delay will not occur. I needed to wait until PlayerAmmo had regenerated to its maximum amount in order to get the recharge delay to function again. I believe that this is because, despite the event being an Else-condition, therefore triggering the moment that the previous even is not true, this does not mean that the event cancels when the previous event becomes true again. It is only when PlayerAmmo regenerates to its maximum amount that the event cancels out. Therefore, I will need to find an alternative way of implementing this behaviour.
I created yet another instance variable for the player called 'GunActive'. This instance variable is used to detect if the player is currently firing their gun or not through the use of the Else-condition. If the X key is held down, set GunActive to 1; Else, set GunActive to 0. Instead of the ammo recharge event being tied to the X key check by means of an Else-condition, it will be tried to the value of GunActive. Therefore, if GunActive is set to one (being in-use), the recharge event will be cancelled.

However, despite what I had predicted, this did not cause the recharge event to stop. I suspect that it had something to do with the 'Every [X] seconds' condition in the event. Without it, however, 'Add 1 to GunAmmo' would add an exorbitant amount of ammo instead of adding 1 to GunAmmo and then ceasing.
At this point, I was at a loss as for what to do, so I took to the internet to see if anyone else has had a problem similar to what I was facing.

'How do I stop event' on the Construct 2 forums. https://www.construct.net/en/forum/construct-2/how-do-i-18/stop-event-90412
I knew of people implementing timers in Construct 2 beforehand, as other students in my class had been talking about them. However, I did not know that a Timer behaviour existed, even after scouring through the behaviours multiple times, embarrassingly enough. With this newfound knowledge, I got to work once again.
The Timer behaviour allows an asset to start/stop a timer. Just like with calling a function, creating a new timer is as simple as assigning the timer a new name called a Tag. Timers come in two forms: 'Once' and 'Continuous'. 'Once' timers stop once they reach their assigned time, whereas 'continuous' timers repeat upon reaching theirs.
For my purposes, I created two timers. The first of these timers was called 'AmmoRegenBufferGun', whilst the second was simply named 'AmmoRegenGun'. These timers were respectively designed to handle the regeneration delay and the rate of regeneraton. AmmoRegenBufferGun was a 'once' timer, whereas AmmoRegenGun was a continuous timer; AmmoRegenBufferGun starts once the X key is released whereas AmmoRegenGun is halted by it in order to prevent continuous regeneration. Upon the completion of AmmoRegenBufferGun, it starts the AmmoRegenGun timer; upon the completion of the AmmoRegenGun timer, a value of 1 is added to GunAmmo.


31st March
FURTHER MODIFICATIONS TO THE FLIGHT SYSTEM:
Before I continue working on the player's special weaponry, there are elements of the player controls that I wish to refine and add to.
There are two issues with the flight system as it stands. The first of these problems, the most basic of these problems, is the fact that there is no ceiling to the levels of speed that the player is able to achieve. With no speed ceiling, the player is able to accelerate to an infinite level of speed. For one, the game wouldn't be hard if the player was able to out-accelerate any threat that opposed them. For two, if the speed of the aircraft is too high, it will be consequently harder to control and result in the player crashing.
The second problem that plagued the flight system was linked to the performance of the aircraft under high speeds. As it stood, there was no performance penalty for achieving high speeds. The reason that this is a problem is because without some form of penalty for achieving high speeds, there is no incentive for interacting with the speed system; the player is encouraged to mindlessly throttle down as no consequences will come of its overuse.
I first solved the issue regarding the infinite speed the player can achieve by assigning an instance variable to the player: 'SpeedCeiling'. I added a speed check condition to the acceleration event to check whether the player's current speed was less than the SpeedCeiling. If it wasn't, the player thus would not be allowed to accelerate.
My solution for the second issue was to lessen the player's rotational speed when at high speeds. I created two more instance variables: 'HighSpeeds' and 'RotationHighSpeed'. HighSpeeds is a variable used to determine which speed classifies as high speed, whereas RotationHighSpeed is the variable used to determine the player's rotational speed when above the high-speed limit.
Due to the multi-faceted element of rotational speed I was introducing, I had to splinter off the Stall check sub-events into new sub-events in order to determine rotation speed.

FURTHER WORK ON SPECIAL WEAPONRY:
An idea that I had for a second weapon to replace the long-range lock-on missiles was a railgun.
Railguns were also a weapon that existed in ACE COMBAT 7, and were essentially the sniper rifles of the air. They were unguided, lightning-fast single-shot weapons that could kill most non-boss aircraft in one shot at the cost of a long recharge time and a requirement of high precision.
However, it isn't ACE COMBAT 7 in particular that I am drawing the function from. The 2020 indie game 'Project Wingman', inspired by the ACE COMBAT series, also uses railguns for a variety of enemies and two post-game super aircraft. Unlike ACE COMBAT 7, however, these railguns have a decently long charge time before firing.
I believe that this would be a good fit for my game because of its dichotomy with the bomb. Whereas the bomb is a slow weapon that is launched in an arc and can be shot down, the railgun is an incredibly fast weapon that can be operated from long ranges and avoid being shot down. However, the advantage that the bomb has over the railgun is the ease of use and a lesser recharge time. Given the delay of the railgun shot, if the player is forced to veer off-course due to incoming projectiles while the railgun is charging, the railgun will completely miss the intended target. The player needs perfect patience and precision in order to harness its destructive power.

I added in three assets pertaining to the railgun: 'RailgunShell', the projectile fired by the railgun; 'RailgunExplosion', the explosion caused by the railgun shell upon hitting a target; and 'RailgunChargeVFX', a visual effect which indicates the charging of the railgun before it fires. For the explosion, I simply duplicated the explosion that I had created for the bomb and recoloured it to a pink colour palette to sell the futuristic nature of the weapon.
I also added the instance variable 'SpecialWeaponAmmo', used to determine the ammo of the special weapon that the player is using, and the sprite 'PlayerAmmoSpecialWeapon', used to visually represent the ammo of the special weapon.
Unlike the player's gun, the special weapons are all single-shot. SpecialWeaponAmmo is completely depleted upon firing, at which point the player must wait for SpecialWeaponAmmo to fully regenerate before being able to use it again. Also unlike the player's gun, ammo regeneration begins the instant each special weapon fires, as the regeneration buffer was only implemented to prevent the player from spamming their gun as it recharged. As both special weapons are single-shot, there is no reason to implement it.


With these elements included, development of the player's weaponry, and by extension the player, is complete at 37 events. Developing the player was far more complicated and both time and event extensive than I had anticipated; certain gameplay mechanics required constant iterations in order to nail down, whereas other mechanics had to be completely scrapped due to unfeasibility.
However, the challenges that I have faced in developing the player have taught me valuable lessons in creating a game with Construct 2. The challenges that I had faced in implementing these mechanics forced me to research the capabilities of Construct 2 and engage with features I otherwise wouldn't have. This led me to acquiring an understanding of the Else condition, the Timer behaviour and how to properly format sub-events. Knowing how to format sub-events in particular was an important discovery, as they are essential for creating complex event strings. Without them, mechanics such as stalling and the use of multiple special weapons would have been impossible to implement.
This process has elucidated a small problem with my planning. If one was to view the top-down structure in which I had formatted my production plan, I have jumped the gun by working on player weaponry right after the player control, as I should have been programming missiles and evasion next. However, placing missiles and evasion first is in of itself jumping the gun as I had not yet implemented the enemies of the game. This isn't a major issue, since I'm just tackling the process in a different order, but it would hold me in good stead to properly format my production chart.
Ground Enemies
The next set of assets that I was to develop were the ground enemies.
These enemies are:
- Anti-Aircraft (AA) Guns
- Flak Cannons
- CIWS
- Surface-to-Air Missile (SAM) Sites
These enemies will be containers, consisting of two parts: the base and the turret. I will also need to develop the projectiles for said enemies. It is for this reason that I have assigned the SAM Sites as the final enemies to develop on this list, as missiles are the most complicated of these projectiles and developing them will tie into the development of evasive countermeasures for the player.
Going into the development of the enemies, I am quite optimistic. I am already very familiar with the use of containers and the Turret behaviour, as I used these features to create the Cherub during the development of Ijiraq. This is territory I have trod before, so I anticipate little of the major setbacks that I encountered during the player's creation.
The first enemy that I was to develop was the AA gun. To achieve its firing patterns, launching a stream of bullets one volley at a time, I gave the turret of the AA gun the Timer behaviour and two timers: the 'AAFireEnd' single timer and the 'AARateOfFire' continuous timer, both of which starting upon the firing of the turret. AARateOfFire spawns a bullet once the timer ends; AAFireEnd stops AARateOfFire from continuing once it ends.
It also dawned on me that, assuming that there would be multiple instances of an AA gun in one area, having a set rate of fire would be very boring to fight against, as every gun would fire at the same time. To remedy this, I set it so that the rate of fire of the turrets would be randomized every tick.


However, despite the rate of fire of the AA guns being randomized, both instances of the AA gun seen fire at the same time. I assume that this is because even though the rate of fire is being randomized, is isn't randomized for each instance of the AA gun; the rate of fire is a universal value. Therefore, rate of fire could not be used to achieve the effect I was looking for. Timers, however, are not universal; they are unique per instance. Instead of using the rate of fire to make the AA gun fire, I can instead use the timer to replicate the same effect on an individual basis.


1st April:
I realised as, because the turret's firing timer began on creation with no actions implemented to stop it, the AA guns would keep firing even after the player had left their range. However, this incorporated a slight overhaul of the script I had created for the enemy. I had replaced the 'On created' event condition with the 'Turret has target' event condition to initiate the firing timer, else the timer would be stopped. However, this caused the AA gun to stop firing entirely, so I decided to reverse the order of events, as it were. When right-clicking on a condition, you have the option to invert said condition. In this case, if the turret does not have a target, AAFire is stopped, else the timer is started. This caused the AA guns to start firing again, although admittedly I'm unsure as to why it works now.
Also of note is that, with this setup, the AA gun will be unable to fire if the 'Trigger once' condition is not present. Otherwise, the AA gun will constantly start the timer over and over again, meaning the timer will never actually begin to count down. Therefore, I made AAFire a singular timer that is started again upon the finish of AAFireEnd.

The second enemy that I was to make was the flak cannon. The complicated part of developing this enemy was the fact that, unlike the AA gun, this enemy is not supposed to be able to turn 360 degrees. I planned for it to be able to track the player within a certain angle; if the player exceeded this angle, the turret would not be able to follow them.
However, though I was worried about implementing this feature at first, the solution proved to be rather simple. I simply gave the base of the flak cannon the Line-of-Sight behaviour to form the angle which the flak cannon is able to track the player in. If the player is not detected by the base of the flak cannon, the turret is prevented from rotating.
The real issue that I had to face was the fact that, as the flak cannon was unable to rotate 360 degrees, I would need to implement some method of flipping certain instances of the flak cannon in the opposite direction.

I had added an instance variable to the flak base called 'FacingLeft'. When FacingLeft = 1, the flak base and the flak turret will be flipped and their angles will be set to 180 in order to face other directions. However, upon doing this, the flak cannon's line of sight stopped working completely, even the one that was not flipped. The only option I can see, therefore, is to clone both the flak base and flak turret and reimplement the same events for them as I had done for the base flak turret, which would eat into my events.

This was the original targeting and firing behaviour of the flak cannon. Though the rotation of the cannon and the firing behaviour worked near perfectly, the FlakFire timer would reset if the player left and re-entered the line of sight of the cannon. I needed to establish a way of getting the flak turret to continue rotating without re-initiating the firing timer.
I added the instance variable 'Firing' to FlakBase. The Else condition event which previously made the turret initiate rotation and started the FlakFire timer then split off into two sub-events with the conditions 'Firing = 0' and 'Firing = 1'. If Firing equalled 0, then the same actions would take place with the addition of setting Firing to 1. If Firing was set to 1, only the rotation action would take place. Finally, upon the FlakFire timer finishing, Firing would be set back to 0.
These events were copied for FlakBase2 and FlakTurret2.

22:28 PM:
Before moving on to program the exploding behaviour of the FlakBullet, I had made the decision to scrap the CIWS enemy. For all intents and purposes, it was simply a slightly beefier clone of the AA gun, and the total number of events had hit 53 with the completion of the flak cannon. It would be a waste of resources to spend a big number of events on programming a new enemy that added so little to the table.
Therefore, the ability to shoot down projectiles as seen in the concept art was reassigned to the AA gun. This was simply implemented by assigning an 'OR block' to the event that caused the bomb to explode and assigning an 'On collision with AA Bullet' condition. I had also reduced the time it took for the AA gun to fire from 4.0 - 8.0 seconds to 3.0 - 6.0 seconds.


2nd April:
Today, I will simply be working on the the behaviour of the flak cannon's projectile.
Whilst browsing YouTube, I came across another video by the channel Jerementor, the same channel documented in pre-production and planning from which I got the idea to roll both playable aircraft into one entity through the use of instance variables. This video in particular was documenting the construction of a 360-degree bullet spawning method for use in bullet hell games. I really liked the effect created by this, and I decided to incorporate it into the flak cannon's projectiles since I believed that the added threat of a projectile spray would make it more fun to fight against than a simple big explosion.
'Construct 2: BULLET HELL 360° MOTION | Jerementor'; Jerementor, March 25th, 2016. https://youtu.be/ta4SMQH0-nU

This is the code seen in the video which Jerementor used to achieve the 360-degrees bullet ring.
The expression 'LoopIndex' refers to the number of times that the action is being repeated- in this case, twelve.
The LoopIndex is then multiplied by 360, and the result is divided by the same value as the LoopIndex.


3rd April:
I ran into an issue regarding the flak cannon when testing it alongside the AA gun. In particular, it was an issue with the bullets that the flak explosion spawned. I had made the flak projectile spawn eight AABullets upon reaching 0 speed. However, to achieve the multi-directional effect seen in Jerementor's video, I had to disable the 'Set angle' property of the AABullet which set its angle to the angle of motion. This caused the AABullets spawned by the AA gun to fire in a horizontal line regardless of the turret's facing. Therefore, I cloned the AABullet to use for the flak cannon and disabled the set angle property for it whilst I re-enabled set angle for the AABullet. Besides this, the events remain unchanged.

The final ground-based enemy that I was to develop was the SAM site. This was by far the easiest of the three ground units to develop, however, due to behavioural simplicity. Unlike the AA gun and flak cannon, both of which had complicated firing patterns or mechanics, the SAM site simply functions like a standard turret. Instead of using the Timer behaviour, I realised that you could simply set the rate of fire through events and implement a random firing speed that way. Implementing the lock-on behaviour of the missiles was as simple as giving them the Turret behaviour and enabling predictive aiming.
Upon collision with either the player or the player's bullets, the missile explodes.


Elements that should be true under all circumstances, such as the targeting of the SAM/AA enemies and various angles of animations, were assigned to a massive 'Every tick' event instead of eating up into my events by assigning several 'Every tick' events.
4th April - 11th April
Note: As of April 4th, it is the Easter Holidays. Therefore, production will be slowed from now until April 18th in order for me to relax.
4th April:
The next element of gameplay that I was to implement was flares. Flares are intended as a countermeasure for enemy missiles in case that the player has not turned to shoot them down should they already have drawn close. Like with the explosion created by the player's bombs, I intend to implement this effect by applying a 360-degrees line of sight to the flare to simulate a radius. Upon entering this radius, the missile will lose track of the player.


5th April:
With the SAM site finished, development of the ground enemies has finished at 67 events. I am now rapidly approaching the limit of events that can be used with the free edition of Construct 2, a fact which is deeply concerning to me. On top of having to develop the two remaining enemies, the Chopper and the Interceptor, I also need to incorporate health values and death states for each enemy. My worry is that, upon implementing these elements, I will not have enough events at my disposal to implement features such as the menu. However, we'll only know this with time.
The next enemy that I am to implement, as previously stated, is the Chopper enemy. As seen in the pre-production and planning segment, I had already developed and tested the movement behaviour, so the only aspect of the Chopper that I need iron out is its firing patterns.
The Chopper is unique in comparison to the other enemies in regards to how it utilises two weapons instead of one: missiles and a machine gun. However, implementing this behaviour was anything but unique. I gave the Chopper both the Line-of-Sight and Timer behaviours, and an instance variable called 'Attack' which determined which weapon the Chopper would be using upon its attack.
Upon entering the Chopper's line of sight, or if the timer in question had elapsed, the timer 'ChopperAttack' would initiate and the Attack variable would be randomized to either a value of 1 or 2. Depending on what value the instance variable is set to upon the conclusion of the timer, the Chopper would either fire off a missile or fire its guns. The behaviour of the Chopper's guns was taken from the AA Gun, starting two timers pertaining to both the rate of fire and the duration of the attack.
These behaviours also splintered off into sub-events to determine the angle of the Chopper's projectiles depending on whether it was flipped.


6th April:
Today, I revisited the flak cannon enemy in an attempt to see if I could successfully flip it while keeping its behaviour intact. The issue that I was facing, it turns out, was due to a simple oversight; mirroring a sprite does not affect the angle of said sprite. This was the cause of the previous behavioural issues as the line of sight was oriented in the direction of the sprite's angle, meaning that the line of sight faced the same way it did originally whilst the sprite now faced the opposite direction. By implementing events to change the angle as well as the appearance of the sprite, I was able to flip the flak cannon and keep its behaviour functional. This allowed me to cut out the FlakBase 2 and FlakTurret 2 assets as well as any events pertaining to them, allowing me to cut down on event usage.


7th April:
My plan for today was to implement the health values of the enemies. As I am using the free version of Construct 2, and thus do not have access to the families feature to assign all enemies into one group, I must repeat the subtraction of health upon certain conditions for every single enemy. The player's gun subtracts 5 from these health values on contact whilst bomb/railgun explosions subtract 40 upon acquiring line of sight.
The first entity which I worked to apply health values to was the AA gun, with a health value of 20. I also created another asset, 'AADestroyed', to serve as a body of sorts for when the AA gun is destroyed instead of deleting it outright from the map. Upon reaching a health value of 0, AAGun is destroyed and MissileExplosion, which I renamed to 'NPCExplosion' since I was planning to use it for all enemy death animations, and AADestroyed are spawned in its place.
However, an issue arose when testing this. PlayerBullets work perfectly, subtracting the AAGun's health on contact. The various explosions, however, do not cause this value to go down. For some reason, the explosions are unable to acquire a line of sight with the AAGun. I reused the Target asset seen during early production, and yes- the explosions are able to maintain a line of sight with the Target and thus cause it to destroy itself.


Whilst experimenting, however, I realised that the source of the problem came from an unexpected place: the 'Or block'. Upon disabling the Or block and removing every condition except for 'BombExplosion Has LineOfSight to AABase', BombExplosion could maintain a line of sight with the AABase and subtract its assigned value from AABase's health. I am unsure as to why this is happening, as additional conditions within an Or block should not affect the results of other conditions in the event.
The second enemy that I assigned health values to was the SAM site. The implementation here was not much different than it was for the AA gun, so aside from the creation of a new asset for a destroy SAMBase, there is little to talk about in regards to the SAM site itself.
In regard to the missiles that the SAM sites fired, however, I had added in something new: contrails. In the concept art, missiles left behind streaks of smoke from the engine that lingered in the air. To achieve this effect, I added the sprite 'Contrail' and assigned it to spawn from the Missile every tick. I also assigned an instance variable to Contrail, 'Visibility'. Every tick, the opacity of Contrail was set to this instance variable and the instance variable was reduced by one. This would create the illusion of the missile contrails vanishing over time. I also set Contrail to destroy itself upon reaching 0 visibility in order to prevent performance issues.


The final enemy which I was to apply health values to was the flak cannon. However, as I was doing this, I ran into an issue to do with the flak cannon's targeting once again. As seen in the footage from April 6th, when both cannons are facing the same point, their behaviour works perfectly. However, once these cannons are facing the opposite direction, the behaviour ceases to function. I believe that this is because that when each cannon is facing the opposite way, at least one instance does not have a line of sight to the player, and thus the line-of-sight dependent action occurs. It turns out that this issue was to do with the Else condition I had in my event. By replacing the Else condition with an un-inverted 'Has LineOfSight' condition, this problem was solved.
IMPORTANT NOTE: DUE TO BURNOUT, PRODUCTION OF THE PROJECT WILL BE HALTED UNTIL APRIL 18TH.
I HAD ALSO, SOMEHOW, LOST THE WORK I HAD DONE PREVIOUSLY: THE EVENTS FOR THE SAM DEATH ANIMATION AND FLAK DEATH ANIMATION HAVE BEEN LOST AS A RESULT.
18th April - 25th April
18th April:
As of the 18th, the holidays are over, and work on my FMP will continue. The home environment was not an efficient environment for me to work in. I hope that now I am back in college, I will be able to work quicker and more efficiently.
Unfortunately, this one-week break has thrown my production chart into chaos, as I had developed it with working from home in mind. Thusly, I doubt that I will have the time to implement a myriad of extra features to the game after the first build is complete. Despite this setback, however, I will continue working according to the schedule in descending order.
The first thing I needed to implement upon resuming development was the health values of the enemies. As previously seen, I had already implemented the health and death conditions of the AA gun. For the SAM site, I simply duplicated these events but replaced the instances of AABase and AADestroyed with SAMBase and SAMDestroyed.


Like with the Charger enemy from Ijiraq, I believed that a bigger and more dominant foe needed a far more cathartic death sequence than its lesser peers. My idea for the flak cannon's death sequence was that, unlike the AA guns and SAM sites that were simply obliterated upon their death, the flak cannon would light up in an array of explosions which send the turret flying backwards, rendering it inoperable.
This complex approach to a death sequence meant that I would need to handle it differently than I handled the AA/SAM death sequence. Since this sequence required the FlakTurret to work, and the FlakTurret was in a container with the FlakBase, I couldn't delete the FlakBase as it would cause the FlakTurret to be destroyed. Therefore, instead of creating separate assets for the destroyed version of the flak cannon, I added a second animation to the base and turret to reflect their destroyed states. Upon the FlakBase's health value being reduced to zero or lower, the animations of both assets would change.
Also unlike the AA/SAM enemies, I had to add the 'Trigger once' condition to the events that checked whether BombExplosion/RailgunExplosion had line-of-sight to the FlakBase. This is because unless it is specified to only trigger once, the action triggered by these conditions will trigger every tick whilst the conditions are true. This results in the flak cannon being destroyed instantly despite it's higher health value, as a value of 40 is being subtracted from its health every tick.
Finally, I added a variety of imagepoints to the FlakBase for the various explosions to spawn at upon reaching zero health.


However, I ran into an issue regarding this behaviour. Due to the 'Trigger once' condition, once one flak cannon had initiated the explosion sequence, it would not trigger again due to being set to only trigger once while true. However, when replacing this condition with the 'For each' loop condition, which repeats the following actions once for every instance of the object, the flak cannon would not stop spawning explosions upon its death. I couldn't figure out a way to solve this issue, so I sadly had to scrap the concept and utilise the same death sequence as the SAM/AA enemies.


With the implementation of these death sequences, I have unfortunately ran up to 100 events and thus will be unable to continue my work on Construct 2. However, after checking in with staff, it is confirmed that they will purchase Construct 3 for student use, allowing me to continue my work whilst also opening up a slew of new features for me to use. In particular, the 'Families' feature made available in Construct 3 allows me to drastically cut down on the amount of events I use. The irony isn't lost on me.
19th April:
Whilst messing around in the asset test, waiting for news on Construct 3, I ran into a problem with the Chopper enemy. It turns out that the issue that I faced with the flak cannons extends to the Choppers too: the event checking for the player's X position relative to the Chopper applies globally, not individually for each instance. It isn't checking for whether the player's X position is less than each unique Chopper's X position, just that the player's X position is less than a Chopper's X position. What this means is, upon the conditions that cause the Chopper to mirror itself, every instance of the Chopper flips. Applying behaviours to specific instances instead of globally is a recurring issue which makes me want to tear my hair out every single time I run into it.
However, I managed to solve this by creating a blank event with the 'For Each' loop condition, which branched off into sub-events which checked for the player's X position in comparison to the Chopper. In my previous attempts to fix the flak cannon's death animation, I applied 'For Each' as an additional condition instead of a separate event. I wonder if that's where I went wrong.


With this in mind, I set out to re-implement the flak cannon's old death animation. Sadly, this did not fix the issue.
However, whilst running through the bug a few times and tinkering with a variety of conditions and events, I stumbled upon something fascinating. When the explosion sequence had the condition of 'Trigger once', the explosions would spawn on the already destroyed flak cannon once the second was destroyed. However, upon removing this condition, the explosions would spawn on each flak cannon.
I don't know why it's the case, but the trigger once condition causes the explosions to only trigger for the first instance of flak cannon that reaches zero health. Knowing this, I would have to find a way to limit the explosions of the flak cannons in a way that doesn't use the trigger once condition. Therefore, I decided to add another instance variable to FlakBase: 'Explosion'. I added a condition that the explosion event could only trigger if Explosion = 1. I then added an action to the sequence that set Explosion to 0, consequently preventing the sequence from triggering more than once. When using this method, 'For Each' has no effect on the flak cannons, and therefore can be removed.


I'm elated beyond measure to finally have developed a functional version of this death sequence, after I spent so much time spent bashing my head against a wall, pursuing different solutions that went nowhere. Testing for bugs is an incredibly challenging task; not for finding them, though they can easily escape notice, but for finding what causes these bugs and how to fix them. I only deduced that the 'Trigger once' condition was the part of the code affecting the spawn of the explosions through relentless testing; and to be honest, there wasn't much rhyme or reason to it. I simply poked and prodded at the problem until an answer showed itself.
Upon reviewing the previous test footage regarding the rotation of the chopper, I noticed that only the chopper on the right attacked the player. This, once again, is because of 'Trigger once' preventing the second chopper from activating the event that starts the attack timer. Therefore, I used what I had learned from fixing the flak cannon by assigning the instance variable 'InitialContact' to Chopper and assigning an instance variable comparison as an additional condition to the aforementioned event.


I also felt that the death sequence for the chopper needed an overhaul; it was incredibly lacklustre as it stood. I decided to add a new asset: 'ChopperDestroyed'. This asset would be spawned when Chopper reached zero health, prior to Chopper being deleted. ChopperDestroyed would fall to the ground, wracked with miniature explosions during the descent, and explode upon touching down.
I also made the decision to reduce the health of Chopper to 40 down from 60. As both a helicopter and an extremely deadly foe combining AA fire and missiles, being able to tank a bomb or railgun shell to the face is a bit overkill and makes them unfun to fight.
After implementing this, though there are still some elements to touch up on (I previously wasn't able to implement a health bar for the player, for one), I figured it was time to move on.
The next big task that I had to undertake was the creation of the level itself. The first thing that I had to do was create the assets required for creating the level. Like I had done with Ijiraq, I was planning to make the level itself (the physical ground) through use of a 32x32 pixel tilemap. Though it looks and sounds simple, working on the scale of pixels like I had done takes an incredibly long time. I spent the entire afternoon of the 19th working on the tilemap, in fact.
I had developed three types of terrain for the level: grass, dirt and rock.
Each type of terrain consisted of:
* A borderless block to fill in masses of terrain.
* Four blocks with borders on the top, bottom and left/ right respectively. Used for abrupt ends of terrain masses.
* Two types of incline, steep and slight.
However, upon inserting these tiles into Construct 3 and testing them out, I noticed numerous glaring errors. The detail on the grass terrain was too small to be noticeable; the steep inclines in terrain did not properly connect to the flat terrain, resulting in gashes in the environment; and as they started at 15y instead of 0y, the slight inclines couldn't properly connect to either flat terrain or steep inclines. That last note in particular was a gargantuan oversight on my part, embarrassingly so.
However, although the slight incline tiles completely failed in their purpose, the jagged effect that they create suit rocky terrain.

First tilemap.
The second version of the tilemap took an extraordinary long time to create. This wasn't because I added a lot of extra detail, but because I had to make dozens of tiny revisions to the tilemap when I noticed tiles weren't connecting properly. In particular, the transitional tiles that were compromised of two types of terrain (grassland transitioning to dirt and dirt transitioning to rock) took an extreme amount of time to complete. I had to create a whole slew of new tiles, ranging from brand new to slight alterations of old tiles, to ensure that everything connected properly.
20th April:
As previously stated, my ability to work from home isn't as good as it is within a college environment. However, every bit of work that I can get done is important, so in the meantime I will be working on miscellaneous details of the game. Today, I will be working finalized designs of the assets seen in game thus far, the first of which being the player aircraft.
I also needed to add in an additional visual effect for the player. Up until this point, there has been no visual indicator for the player using their afterburners when accelerating. To implement this, I decided to implement two more assets. The first of these assets would be the visual effect of the engines themselves, and the second asset would be a small visual indicator that the engines had been turned on. Like I had done with the VFX for the railgun, these visual effects would be set to an image point of the player every tick.


21st April:
As I had already begun working on the graphics in my own time, I decided to use the time that I had today to finish developing the finalized sprites. As stated during pre-production, the graphical style I am angling for is based on the aesthetics of the Cel-shaded art style. Therefore, there are aspects I focused on above else: bold blocking, to ensure the sprites pop out, and shading, which gives sprites more depth and equalizes the harshness that comes with monochromatic colour schemes.
My art skills are not fantastic, not by a long shot, but I am highly pleased with how the re-designs came out. However, even with the limited amount of sprites that I had to redesign, this effort took me nearly the entire college day to complete. While the player character and the enemies required complete sprite overhauls, the various projectiles I believed looked fine as they were.
On top of redesigning the enemy sprites I had developed, I had decided to add visual effects for both player and enemy bullets to make hitting an enemy, or being hit by an enemy, more impactful. To create these visual effects, I simply reused the revised explosion animation and recoloured according to the projectile and resized it.

22nd April:
On the topic of enemies, I had made the decision to scrap the Interceptor enemy from the game. The reason behind this was twofold. The first reason behind why I had scrapped the Interceptor was due to time concerns, that, as I was nearing the deadline for our project, I would be wasting valuable time that would be better spent finalizing the project instead of adding fluff. The second reason behind this decision was that I didn't know how I would make the Interceptor a unique and fun enemy to fight against, especially when the Chopper already fills in its role as a powerful aerial enemy.
Therefore, the Interceptor shall not be developed.
Now that the player and all the enemies had been developed, and their sprites finalized, there was only two more series of assets for the game I needed to create. The first of these were the backgrounds, which I believed to be simple enough to implement. As I had done with the UI in Ijiraq, I could use the 'Anchor' behaviour to pin the background sprite in place relative to the viewport, keeping it in view regardless of where the player moves.
The second series of assets I had to make were far more important for the gameplay. As stated in pre-production, the concept of this level was an assault on a military airbase. Though I had developed all the enemies, I hadn't yet developed the assets for this airbase. The reason that this is important for gameplay is that it's the player's objective, what they must accomplish to win the game. I don't think it would be fun if I made the player go on a scavenger hunt trying to kill every last enemy in the level. Instead, I want to have the player destroy a select few key targets to beat the game, and have the option to engage enemies at will.
Something interesting that I discovered, prior to the development of these assets, was the nature of the Tiled Background asset. Up until this point, I didn't understand what the purpose of it was. Unlike a regular sprite, which squashes and stretches as you expand it, the tiled background duplicates its appearance as it is extended. Using this, I was able to create the walls for the airbase as seen in the concept art.

25th April - 2nd May
25th April:
As I was developing assets to populate the worldspace, I had came up with another enemy: the Pillbox.

My biggest concern at this stage in development was variety. As it stood, the variety of enemies I had was meagre, and the amount of buildings to populate the environment were next to none. I feared that this would make the game barren and boring, flying around an empty world where the only resistance is the same handful of enemies over and over again.
To this end, the Pillbox was created- serving as both a building and an enemy. When entering the range of the Pillbox, it would fire a single bullet at the player every 0.6 seconds. Its rate of fire is dwarfed by that of the AA Gun and Chopper enemies, but the ability of the Pillbox to track the player's position makes it a unique threat; instead of cordoning off the airspace, it forces the player to move.
I also applied the Solid behaviour to the Pillbox, allowing me to position other enemies on top of it. Combining the relentless suppressing fire of the Pillbox with the capabilities of another enemy turns an encounter with the Pillbox into a pseudo boss fight.


The second building that I created was the Hangar. This enemy was to predominantly occupy the airbase at the end of the level. I originally intended for this to simply be a building and nothing more, but as the Pillbox had established buildings possessing unique behaviours, I decided to give the Hangar it's own role.
I made the Hangar capable of spawning Choppers to attack the player. However, this was something that was in desperate need of balancing in order for attacks on Hangars to not turn into Chopper fiestas.
One of the features in Construct is Hierarchy. Hierarchy allows the user to assign certain assets as 'parents' and 'children'. Assets assigned as children can be set to follow their parent, but this isn't the purpose of me using the Hierarch feature. By assigning the Chopper that the Hangar creates as a child, this allows the Hangar to keep track of whether it has spawned a Chopper or not.
If the Hangar has no children, it will wait four seconds and then spawn in a Chopper and assign it as a child. By assigning the newly-created Chopper as a child, the conditions to trigger the event will not be met and the Hangar will be unable to spawn another Chopper so long as its child is still active.
The Chopper spawned by the Hangar is set to its default variables on creation, so I had to calibrate the health and size of the Chopper through events. I had also added the Bullet behaviour to the Chopper to create the efect of the Chopper getting spat out of the Hangar. The Chopper is set to have a negative acceleration and disable the Bullet behaviour upon reaching zero speed.


When testing another building that I had developed, an air control tower that the player must avoid colliding into, I didn't place the Hangar far enough away from the layout, causing it to drop down onto the tiled background and create a Chopper that would fire at me from off screen. This made me realised that my current implementation of the Chopper's firing and pathfinding behaviour had a flaw: once it was triggered, it would never stop. Therefore, using the Chopper's Line-of-Sight behaviour, I overhauled the timer triggers to be Line-of-Sight dependent. This made the 'InitialContact' instance variable of the Chopper redundant, so I deleted it.


Whilst developing the death sequence for the Fuel Tank, I learned that if a 'Wait X' action is inserted into a sequence, the action prior to the wait shall be repeated every tick until the wait is finished.

26th April:
The first task that I saw to today was to create a health bar to indicate how much health the player has left. On top of this, I went back and edited the appearance of the ammunition bars to stand out more, incorporating a black border around them. I also made a small adjustment to the player's health. Previously, the player had 100 health. However, I didn't want to draw 100 frames worth of health, so I instead brought their health value down to 10 and adjusted enemy damage accordingly. This should have no effect on gameplay, but it was important that I address it.

On the topic of sustaining damage, there was a new element of gameplay that I wanted to implement: screen shake. I wanted to implement screen shake because it gives events such as killing an enemy or getting hit/destroy more impact. The only thing I wasn't sure about was how to go about implementing this- but the work had already been done for me.
On the Cosntruct 3 website, there are a number of template games hosted for the user to look at and alter. One of these games is known as 'Boss Fight', a platforming action demo where the player must fight a giant robot with a variety of behaviours. The screen shakes whenever the robot attack to add weight to its actions. Therefore, I decided to open up the template and see how they achieved this effect.

'Segmented Boss Fight', Create Your Own Games - Free Trial (Construct.net). https://www.construct.net/en/make-games/free-trial

To achieve the screen shake effect, the game makes use of the Function asset with two local parameters appended to the event: Intensity and Duration. When an event calls for the ShakeScreen function, the event in question sets the Intensity and Duration to a specific amount. On the execution of the function, an asset with the Tween behaviour will alter the layout scale by setting it to its default size (governed by the global variable 'DEFAULTLAYOUTSCALE' as seen above) plus a random variable between a standard and minus value.
By altering the expression so that both Tween values are plus, the camera will zoom in sharply and gradually reset to its natural state. Conversely, by altering the expression so that both Tween values are minus, the camera will drastically zoom out and slowly move back in. I believe that because the event is not appended with the 'Trigger Once' condition, thus causing the actions in the event to repeat every tick, the random value will swing between
-Tween.Value("ScreenShake") and Tween.Value("ScreenShake"), causing the layout scale to rapidly shrink and grow as the Intensity parameter is lowered to zero (governed by the Duration parameter), lessening the shake. Setting the layout scale to (DEFAULTLAYOUTSCALE + random) anchors the layout scale, ensuring that as the screen shake dies down, the scale will return to its natural state.


I had also altered the damage of certain attacks to only deal half of the player's health in terms of damage instead of instantly killing them. This allows the player some leeway when it comes to fighting the more dangerous foes of the game.


With this, the majority of gameplay mechanics I had to implement were finished. Now, I simply needed to finish off the tilemap and create the backgrounds for my game. Once that was finished, I would be able to design the level for my game.
28th April:
As stated previously, my next task in developing my game was to finish the creation of my tilemap and then move onto the creation of the background for my game.
Implementing the background wasn't a hard task for me to perform. First, I created a new layer for me to apply the background to. Once I had done that, I created a sprite on the background layer and applied the appearance of the background to it. I then applied the Anchor behaviour to the sprite and stretched it out in order for the sprite to fill out the layout scale.
The design of the background is a combination of the two ideas for the game's setting that I had came up with during pre-production and planning. The level still takes place in the countryside, but drawing from the idea of the storm that raged overhead in the 'Air-to-Ground Assault' concept art, the weather has been changed to be dour, dark and cloudy. I believe that the juxtaposition of the stormy weather and the bold, cartoony graphics of the game communicates an element of seriousness while remaining playful all the same.


2nd May - 9th May
28th April:
Now that I had finished working on the background, and with it having finished all the necessary assets for my game, it was time for me to develop the level itself.
I had not plotted out how I wanted the level to look beforehand, so when it came to level design, I was flying by the seat of my pants. However, I had a set of concrete ideas that I wanted to incorporate into this level, regardless of what form the level took.
Aside from the airbase at the end, I wanted to create a sense of progression. As the player movees throughout the level, they are slowly introduced to more and more enemies in lower-stake scenarios before, as they player approaches the end of the level, these enemies are thrown together in more challenging environments.
29th April:
Before I cover the various stages of designing my level, I had made some slight alterations to enemies in order to make them more interesting to fight against.
I completely overhauled the firing behaviour of the Pillbox. Because the bullets fired by the Pillbox were only set to the player's current X and Y position, it was unable to lead a shot. This meant that the player could avoid fire from the Pillbox just by accelerating and constantly moving, regardless of the direction. Therefore, I decided to scrap the old behaviour of the Pillbox and create a new asset: 'PillboxTurret'. This asset is in a container with the Pillbox and has the Turret behaviour applied with predictive aiming enabled. From there, I simply replicated the firing behaviour of the Pillbox by adjusting the range and fire-rate values of the PilboxTurret to match.
I had also lowered the time in-between Chopper attacks from 3.0 seconds to 2.25 seconds. The Chopper is supposed to be a fragile powerhouse, and though three seconds is a short time, with such a low amount of health it rarely gets the opportunity to launch off more than one attack, at least by its lonesome. By lowering the amount of time the Chopper must wait in-between attacks, I further allow the Chopper to put pressure on the player and cement itself as a priority target. I also slightly increased the maximum speed that the Chopper can reach from 300 to 400.


It had also occurred to me that, though the Chopper initially can only fire upon the player once they have entered their field of view, the Chopper would attack endlessly after the fact. This is due to the fact that upon launching an attack, the ChopperAttack timer automatically resets upon the attack's completion. Therefore, I needed to add additional sub-events that dictate that the ChopperAttack timer only restarts if the Chopper still has line of sight with the player.


Explosions were another element of gameplay that required tweaking, specifically explosions caused by enemy deaths and coming into contact with a missile. The asset 'NPCExplosion' decreases the player's health upon coming into contact with them, regardless of whether it is spawned by a missile or by an enemy/building being destroyed. In the latter case, being killed by the explosions of a building you yourself destroyed is a horrible and rage-inducing feeling; the former case is more complicated.
As stated during pre-production and seen throughout the production footage, the player's gun is capable of shooting down enemy missiles. However, shooting down an enemy missile causes the same explosion as it would if the player was hit by the missile, causing the player to die if they come into contact with it. This completely defeats the purpose of being able to shoot down missiles in the first place, if missiles shot down can still kill the player post-mortem.
Therefore, I assigned an instance variable to NPCExplosion called 'DealsDamage'. By default, this value is set to zero; in events in which the explosion is supposed to deal damage to the player, DealsDamage is set to 1. I then added a condition to the event that determines NPCExplosion damage the player, stating that it can only occur if DealsDamage equalled 1. This means that, unless dictated to by the instance variable, explosions caused by enemies will not deal damage to the player.
Furthermore, I had noticed that if the player was hit by a missile whilst flying away from it, the resulting explosion would instantly kill the player, even despite the event being appended with the Trigger Once condition. My theory was that because the player was flying away from the explosion, the player would leave the radius of the explosion and thus set the conditions of the event to false. However, because its size rapidly expands over the course of the animation, the explosion comes into contact with the player again after they escape its radius, causing the damage event to trigger again and thus instantly killing the player.
To remedy this issue, I added another instance variable to the player called 'ExplosionDamageBuffer'. The explosion damage event was further altered to only trigger if ExplosionDamageBuffer equalled 0. The damage event itself was then modified to set ExplosionDamageBuffer to 1. After waiting 0.2 seconds, it would be set back to 0. This short buffer prevents the player from being instantly killed by an explosion due to repeated contact.

With the completion of these alterations, it was time that I moved onto designing my level.

Pictured above is the beginning of the level- two small bases for the player to get accustomed with flying and slowly begin introducing enemies, starting with the AA Guns and SAM Sites. Though the ground on which the airbases themselves sit is flat, the air control towers add a layer of verticality of the level, providing different levels for the enemies to fire from as well as posing a collision threat to the player. I had also repurposed the 'rock' texture to create a runway for the airbase.
The positioning of enemies and the vertical aspects are designed with the strengths of the AA Gun in mind. The constant stream of bullets that they shoot restrict the player's movement and, if the player is using the bombs, protects nearby enemies from being attacked. In the second airbase, a SAM Site is placed on top of an air control tower with two AA Guns flanking it to block incoming bombs. One of these AA Guns are huddled close to the Hangar, which shields itself from explosions.
This hangar is to be unique amongst the other Hangars in that it cannot spawn Choppers. The purpose of this Hangar was to familiarise themselves with the enemy and repeat to the player that this is what they are meant to be looking for. I achieved this by applying an instance variable to the Hangar, 'CanSpawnChoppers', a check for which I appended to the event that dictates the Hangar's spawning of Choppers.

The second part of the level that I created, after the player passes the first two airbases, is a small valley with minimal defences after the previous onslaught, capped off by a boss-fight against a Pillbox barricading the path ahead.
I also included a short, optional, risky tunnel flight to prepare the player for the mandatory tunnel flight up ahead and give them the opportunity to take out some optional targets. I am planning to introduce a score system once the level is finished, which will provide the player incentive to go for these fuel tanks.
9th May - 12th May
9th May:

The next section of the level that I had developed was a short tunnel dive, leading into an isolated room with a lone Hangar. The short tunnel dive allows the player to momentarily cool down from the hectic fight against the Pillbox that the player had to win in order to progress the level.
The lone Hangar in this chamber serves as another boss fight, of sorts; this is the player's introduction to the Chopper enemy, and an introduction to the Hangar's Chopper-spawning capabilities now that the player is already familiar with the enemy. This allows the player to familiarise themselves with the Chopper in a low-stakes environment.

However, when playtesting this sequence, two issues occurred to me. The first of these issues was the fact that the sequence was not engaging nor challenging. The Chopper by its lonesome, though in possession of fierce firepower, is not enough to force the player to manoeuvre around the chamber; it can also be destroyed the moment the Hangar spawns it in, if the player has decent timing.
The second issue that I had identified was the limited amount of space that the player was provided to manoeuvre around the chamber. My idea was that by constricting the player, I would be forcing them to tango with the Chopper, avoiding missiles and bullet streams while taking care not to slam into the walls. The problem with this was that the space was too enclosed, making crashing into the walls too common of an occurrence and flying against the joy of this genre of game: freedom of movement.
To remedy this, I made the space in which the Hangar fight occurs larger. Then, I added two AA Guns on either side of the arena. The AA Guns do not make the fight overly hard. Indeed, both AA Guns can be taken out before the Chopper spawns if the player is quick enough, but this spins the weakness of the encounter into a reward: the freedom to take out the Chopper as it spawns is something that the player had to fight to earn.
I had also realised that, when testing multiple Choppers being in the same area, the second Chopper would not attack. Just as I had suspected, this came down to the presence of the 'Trigger once' condition appended to the event that governed the Chopper's initial attack. Therefore, to fix this issue, I reimplemented the InitialContact instance variable, renamed simply to 'Contact'. The initial attack event can only be triggered if Contact = 0; the event itself sets Contact = 1; and upon losing line-of-sight to the player, Contact is set to 0 again.
I had also further reduced the duration of the initial attack timer, from 2.0 seconds to 1.0, to allow the Chopper to put on instant pressure. The durations of every other timer trigger remain unaltered.


Throughout my constant playtesting of the game, I have come to realise that my game is hard. It is incredibly hard, in fact, and I enjoy that element. However, an issue that I then identified wasn't the fact that it was hard- it was that it was unforgiving. The player can receive up to ten hits, up to two if they are struck by a missile, before being defeated. It's a big ask of the player to survive a long level whilst only being hit ten times, so I sought to remedy this.
The answer was very simple: give the player regenerating health. On layout start, a constant timer called 'HealthRegen' begins. Every twelve seconds, this timer restores a singular point of the player's health.


The next segment of the level that I designed was another overworld segment. The open terrain and zig-zag enemy design of the opening airbase attack is combined with the tunnel run elements of the previous underground section to create a valley section. Enemies lurk behind corners to ambush the player, and the Chopper begins to appear as a regular enemy.
The design of this segment particularly suits itself to the Chopper's strengths. The Chopper is only capable of firing on the X-axis, meaning that the enemy is extremely vulnerable when attacked from above or below. To combat this, the Chopper is positioned in tight spaces where getting above or below the Chopper would prove difficult. Thanks to its overwhelming firepower, approaching the Chopper requires quick reflexes to anticipate its next attack and move accordingly.
This section is capped off with another mandatory fight against the Pillbox, this time with a SAM Site situated atop it. Now the player must not only dance around the suppressing fire of the Pillbox, but they must also be ready to counter missile barrages from the SAM Site, unless they have the aim and the timing to destroy it.


The next segment that I had developed for my game was another tunnel run. As was the case with the previous tunnel run, the purpose of this segment is to allow the player a few moments to catch their breath after the onslaught they had to endure in the previous segment. However, I didn't want to rehash the design of the previous tunnel run. As discussed previously, I had repurposed the 'rock' texture to use as the texture for airbase runways. I decided to repurpose the texture again for this second tunnel run. I decided that, as this texture was now associated with the enemy forces, to design this tunnel run as if it were an enemy bunker.
To escape, the player must fly through a long tunnel stretching across the base of the bunker. As the player moves through the tunnel, they encounter a small group of enemies to take out. I initially toyed with a combination of AA Guns and SAM Sites to populate the tunnel, but I decided against this. In an already tight space, the restrictive fire of the AA Guns would be unfair.
Therefore, as it played to their strengths, I settled on populating the tunnel with Choppers. I was extremely happy with the result; in fact, it is my personal favourite segment of the game. It isn't overly difficult, but manages to be riveting nonetheless. It forces the player to quickly assess the threats ahead, move accordingly and use all the tools in their arsenal: ducking streams of gunfire, slowing down to let projectiles fly past, shooting down incoming missiles, using flares to throw off missiles approaching from behind.
As I had done at the beginning of the level, I had also included two optional and dangerous paths for the player to attempt for more points: another Pillbox fight and a tight tunnel system. The fuel tank rooms at the end of the tunnel paths provide the player just enough room to turn around and fly back the way they came.
10th May:
Someone had raised concerns that the sprite of the player character would blend into the background given how dark it is. Therefore, I decided to alter the appearance of the player character by making their colour scheme brighter.


The final segment that I had to develop for my game was the airbase assault at the end of the level.
This sequence serves as the introduction and sole appearance of the Flak Cannon enemy. Powerful yet slow, the purpose of this enemy is to slow the player's approach by blanketing the sky in explosions. This prevents the player from closing in, forcing them to either ascend to high altitudes to attack or opt from range. Due to their slow speed and firing, however, they are not formidable enemies on their own. Therefore, the Cannon has been placed in-tandem with enemy forces. The first cannon is placed near a Hangar, preventing the player from attacking it with ease; the second is covered by AA Guns and SAM Sites.
The final Hangar of the level is flanked by an AA Gun and a SAM Site on an elevated level. As previously stated, the zig-zag placement of AA Guns, allowing them to cover enemies with blankets of fire. This is only exacerbated by the horizontal gunfire of the Chopper, allowing blocking both attacks to enemies in front and below the player, forcing them to think carefully about their positioning and timing in order to take down each of these units and make destroying the final Hangar easier.

Whilst recording this footage, I realised that my game suffered heavily from the same problem that I had identified in LUFTRAUSER: the screen was too small. This resulted in enemies attacking from off-screen, making for a disorientating experience. Therefore, I decided to further decrease the layout scale from 0.6 to 0.4 to help remedy this issue.

With the completion of this segment, my work on the level design is finished. With this, I am nearing the end of the development of my game. I will confess that I'm not the happiest with my level design. Level design is not a skill I am proficient in and, as mentioned before, I hadn't planned the level out, so all of my work was off-the-cuff; the time constraints I was under didn't help, either. What's there works, but it is very slipshod and suffers greatly from a lack of direction.
Now, I must work on implementing additional features: a restart button, win condition, score system, etc. The first and most important feature that I will tackle is that of the win-condition.
I added a global variable to the game: 'HangarsRemaining'. This variable was set every tick to 'Hangar.Count', the number of Hangars present in the layout. I then added text to the layout, as I wanted to inform the player of how many Hangars were still alive. Through the use of the ampersand (&) operator, the user is able to assign text a certain value. I set the text box so that every tick, its text would be set to : "x"&Hangar.Count. If the amount of Hangars equalled 3, in game this text would say "x3". I cloned the sprite of the Hangar, moved the text and the sprite to the top of the screen on the UI layer and applied the Anchor Behaviour to them both.


Whilst testing my game, I found the speed system to be lacking a vital element that encouraged the player to engage with the system. As it stood, there were no speed penalties for rotating. This meant that the player could remain at their base speed, maintaining the faster aircraft handling of low speeds indefinitely, making fights against enemies such as the Pillbox easy.
However, I could not implement this mechanic in the same manner that I had applied the acceleration and deceleration of the aircraft (changing the acceleration value of the Bullet behaviour), as it would override the acceleration values assigned by other events. Therefore, instead of altering the acceleration of the aircraft, I decided to alter its speed directly. I set it so that upon rotation, for every 0.1 seconds the player's speed would be set to 'Player.Bullet.Speed-10'. Therefore, instead of reducing the player's speed via reducing acceleration, the player's speed is reduced by a flat deduction which does not override the acceleration values.
This implementation was not without its issues, however. I needed to achieve a balance. If the rate at which the speed was deduced was too high, it would overpower the acceleration of the player's aircraft; too low, and the player would be able to loiter at super-low speeds for much longer before stalling. Therefore, I decided that the player's speed should not be reduced whilst accelerating, but the value of the acceleration should be lowered.
I assigned another instance variable to the Player: 'AccelerationValue'. Every tick, whilst the up key is held down, Acceleration would be set to the value of Acceleration Value; if the left or right keys are held down whilst holding down the up key, Acceleration is set to 'Player.AccelerationValue-20'.


12th May:
I decided to include an additional touch to the player's turning. I cloned the Contrail asset and its events, setting the value 'Visibility' to 30. I wanted to repurpose Contrail as a visual effect that would occur when the player turned, not unlike how wind spills off the wings of a plane.

For reasons unknown, upon implementing this, the events pertaining to the VFX of the aircraft engines stopped working as they should; the engine would remain on even if the player was not holding down the accelerate button. To fix this, I scrapped the 'Else' event used to govern the animation of AfterburnerVFX and replaced it with an inverted '[Button] Is down' condition.


As seen in the above video clip, I have been dealing with an issue regarding the camera since the implementation of the death screenshake. Upon the player's death, when the screen shakes, without the camera goes wild without the player aircraft there to serve as a focus point for the camera. As a result of this, the screen will flash to random segments of the stage. It's an incredibly unflattering bug, and thus I set out to fix it.
My idea involved the implementation of a second sprite with the ScrollTo behaviour (initially disabled) which would be pinned to the middle of the screen by use of the Anchor behaviour. Upon the destruction of Player, the ScrollTo behaviour of the death camera would be enabled. If all went as it should, the camera would remain focused on the death camera sprite and, thusly, remain centred where the player died upon calling the ScreenShake function.


However, this solution did not work as intended. As DeathCamera had the ScrollTo behaviour applied, the camera would scroll in one direction or the other unless the sprite was perfectly aligned in the centre of the screen. Therefore, I did away with the Anchor behaviour and instead set the position of the sprite through events. In particular, there is an expression known as 'ViewportMidX/Y' which, as the name implies, pertains to the middle position of the viewport. By setting the position of DeathCamera to ViewportMid upon the destruction of Player, the camera would focus solely on the spot where the player had died as DeathCamera was located in the exact middle of the screen.


With this addition, all work that I had to perform on the gameplay of my final major project is finished.
I am extremely happy with how my game has turned out. Although I have ran into countless hiccups during the development process, and it certainly isn't AAA material, it stands head and shoulders above Ijiraq in terms of refinement, direction and enjoyability.
In particular, what I believe set the development of my FMP apart from the development of Ijiraq were the pre-production and planning stages. By meticulously plotting out aspects of gameplay and setting asset development deadlines in order of difficulty, I was never at a loss for what to do. As a result, my work was steady and focused. The sole hiccup in development was the holiday period, in which the combination of a less-than-stellar home environment and relentless work resulted in burnout which set the project back. Even then, I never drastically deviated from the work order like I had done with Ijiraq.
There were only two more aspects of gameplay that I had to develop before I could consider the development of my final major project finished, however. These aspects were the user interface and a score system. I decided to tackle the user interface first.

Instead of opting to use the multi-layout menu design that I had illustrated in the concept art, I decided to condense everything into a singular screen. I didn't have the time to make the title screen fancy, so I kept with the minimalistic aesthetic that I had laid out in my concept art.
From this screen, the player would be able to choose not only their weapon but their skin. I didn't have the time to design an aircraft from scratch, so I simply decided to create a reskin of the default player aircraft. Upon clicking on the buttons pertaining to the equipping of a weapon or skin, a white box would appear in the background to indicate that the skin/weapon in question had been selected.
The final element of gameplay that was to be included was a scoring system. I added a global variable called 'Score' and a text bot with the Anchor behaviour to the level, sat under the various status bars of the player. I set it so that this text box would be assigned the text '"Score:"&Score" every tick. I assigned every enemy an instance variable called 'Points' which was altered depending on the enemy. In the enemy death scripts, I included an event that the system was to add '[Enemy].Points' to Score. As a result, whenever the player kills an enemy, the string "&Score" will change to reflect the current value of the global variable Score. If its value equalled 5, then the text would read: "Score: 5".
As listed on the production chart, the final aspect of the game that I had to implement was sound. During our interactive project, we were tasked with solving an audio problem which could contribute to our grades. For the sake of solving this issue, we were linked to the website 'Freesound.org', which hosted a vast assortment of free sounds.
There are two reasons why I chose to use this site to source my sounds instead of producing them myself. The first reason is the fact that using stock-sounds uploaded online is a far faster process than producing my own sounds, which would require me to scour for items and spend ages experimenting to create the right sound. The second reason is the fact that, even if I were to produce my own sounds for the game, there comes the issue of audio quality. I don't have a means of recording audio besides my phone, so whatever sounds that I did manage to record would be of a bad quality. This method also carries the risk of picking up background noise that should not be in the game.
In using these sounds, I would need to provide credit to the creators of the original sounds and attribute them to right licenses.


I was not satisfied with the original sound that I had used for the AA Gun. By its lonesome, the sound seemed to be a perfect fit for the AA Gun. In practice, however, the realistic gunshot sound clashed with the cartoony aesthetic of the game, taking me out of the experience. Moreover, when multiple AA Guns were firing at once, the sounds generated by each instance of the enemy would overlap and become extremely grating extremely fast.
Therefore, I decided to replace the realistic gunshot noises of the AA Gun with the sound of a plasma rifle, a softer arcade-y feeling sound effect akin to the noise that LUFTRAUSER used for its gunfire. Furthermore, I put a limiter on the sound of the AA fire to prevent the overlapping of the firing sound which led to the grating white noise of gunfire as seen in the above footage. I achieved this by adding a sub-event that branches off from the 'On "AARateOfFire"' event which specifies that the sound will only play every amount of seconds.


With the successful implementation of sounds to my game, as previously mentioned, I would have to attribute the sounds used in my game to the people who had created them. For this sake, I created another layout tiled 'Credits Screen' where the location of the sounds acquired, the sounds themselves, the creator of the sounds and which Creative Commons license it was under was documented.
I also altered the victory screen by replacing the 'ReturnToMenu' button and adding a new button, 'CreditsButton', which would bring the player to the aforementioned credits screen where the sounds used were documented, ensuring that there was no way that a player would not take notice of the external effort that went into this project. This button was also added to the title screen, allowing the player to view the credits without having to beat the game.


When performing additional playtests of my game, I took heed of an error regarding the AA Gun that I, for some reason, had not noticed prior to this point. When playtesting, I realised that the AA Guns once again had synchronised fire rates. To remedy this, I applied the 'For Each' loop condition to the event that determined the fire rate of each AA Gun in the hopes that it would allow each instance of the AA Gun to maintain separate rates of fire.
However, when the player was in the AA Gun's range, despite the fact that the 'Trigger Once' condition was appended, the rate of fire of the AA Gun would change every tick and result in the almost non-existent delay between bursts of fire as seen throughout the development footage. Therefore, I removed the For Each loop and implemented an additional action to the 'on AAFireEnd' event, setting a random rate of fire for the AA Gun. This both solved the issue of the AA Gun firing instantly and allowed each instance of the AA Gun to maintain a separate rate of fire. Consequently, this also made the sections of the game less overwhelmingly difficult, particularly the fight with the Hangar in the shallow chamber.


In addition, I made the decision to lower the health of the AA Gun and SAM Site from 40 points to 30 points. This would not affect the bomb or railgun, as both of those weapons kill these enemies in a single hit, but would make killing these enemies with the aircraft guns easier. I wasn't pleased with the guns; it felt nigh-impossible to hit anything and, when I did, the bullets would not do enough damage to finish off a foe. So on top of reducing enemy health, I gave PlayerBullet an even bigger hitbox and assigned an additional imagepoint to Player, positioned on the nose, which PlayerBullet would be spawned from. As bullets were previously spawned by the imagepoint positioned on the underbarrel cannon, the bullets in actuality would not shoot where the player was aiming. Therefore, I decided to make the player shoot from the nose.
Just for fun, I was fiddling around with the stats of the AA Gun. In ACE COMBAT 7, as was likely the case in real life, AA Guns are not perfectly accurate as they are in this game; like any weapon, their shots have spread. I implemented this by setting the angle of the AABullet spawned to "AATurret.Angle+Random(-30, 30)"; the bullet would fly at a random angle within a 60* cone originating from the AATurret.
This gave me an idea. Like I had done with Player, I could use instance variables to create an alternate form of the
AA Gun. Therefore, I set out to create an alternate, harder version of the AA Gun.
I assigned an instance variable to the AA Gun: 'IsElite', which would determine whether the AA Gun operated as its default form or its elite variant. I also added the animation 'Elite' to AABase, AATurret and AADestroyed to apply the appearance of the elite variant in order to distinguish them from the base form.
Each event pertaining to the firing behaviours of the AA Gun was splintered off into two sub-events: 'Elite = 0' and 'Elite = 1'. In doing this, I was able to alter the behaviour of the AA Gun accordingly for each variant.
On top of utilising spread shots, giving the elite variant stronger area-of-denial capabilities than the standard variant of the AA Gun, it also boasts a far higher rate of fire: 0.01, up from 0.1, allowing it to fire 10x as fast. I counter-balanced this by reducing the upkeep time of its barrage. Whereas the standard variant of the AA gun can fire for 2.0 seconds, creating a prolonged barrier of bullets, the elite variant can only fire for 0.4 seconds. As a result, though more destructive than the standard variant, the elite variant is easier to avoid; although the bullets create a wide barrier the further they fly, punishing the player for flying backwards, encouraging them to get close in order to remain in the optimal evasion range.


With the inclusion of the elite AA Gun variant, I decided to return to the airbase at the end of the level and tweak it. I added two elite AA Guns to the section, the first of which being placed atop the hill overlooking the airbase. I decided to add an AirTower to the hill so that I could place the elite AA Gun on top of it, giving the gun extra height and the ability to attack the player as they ascend from the valley below. In addition, placing enemies on top of the AirTower actually makes killing them easier; weaker foes like the AA Gun and SAM Site will be destroyed instantly by the tower's explosions. Therefore, this makes for a good introduction to the elite AA Gun. The gun also guards a SAM Site;
The second elite AA Gun replaces the standard AA Gun that stands guarding the final hangar at the end of the airbase.


However, given the overwhelming firepower of the elite AA Gun variant, throwing a helicopter into the mix seemed overkill to me. I didn't want to disable this hangar's Chopper spawning capabilities outright, however.
In Construct, there are two values known as 'Instance ID' and 'Unique ID', respectively shortened to IID and UID. IID and UID are values assigned to the instances of assets in the layout. These values are used to designate specific instances throughout the layout, allowing the user to target specific instances during events.
Though both IDs serve the same purpose, there are important distinguishing features between them:
- The IID is an ascending value assigned to each instance of a specific asset within the layout. For example, if I were to place three Choppers into a blank layout, the Choppers would have the respective IIDs of 0, 1, 2, and so on if I added more Choppers to the layout; if I spawned two Hangars afterwards, they would have the respective IIDs of 0 and 1. This allows the user to easily identify and single out specific instances during events, further allowing the user to implement additional scripts and behaviours that affect only the instance specified. However, the IID is not viewable through the Properties bar; the user must enter Debug Layout and inspect an asset to view the IID of each instance.
- The UID is an ascending value assigned to every instance of an asset used within the layout. Returning to the example above, if I spawned three Choppers in a blank layout, their respective UIDs would still be 0, 1 and 2. If I spawned two Hangars, however, the respective UIDs of the Hangars would be 4 and 5. The UID can be readily viewed in the Properties bar.
The UID is a static value; the IID is a dynamic value. If an instance of an asset is destroyed, the IIDs of each instance would change accordingly; the UID of an instance will never change. Therefore, if instances of an asset will be continuously destroyed throughout your game, one would use UID to single out an instance rather than the IID. For my purposes, then, I designated instances using UID instead of IID.
Using the UID, I designated the final instance of the Hangar and the elite AA Gun protecting it. CanSpawnChoppers was set to 0 for this Hangar instance; upon destruction of the elite AA Gun, CanSpawnChoppers would be set to 1, allowing it to spawn Choppers again.


Inspired by this, I returned to and redesigned the valley section that comes after the underground Hangar fight. Due to how the Chopper's pathfinding works, calculating a path to your position the moment it spots you, entering the sight of the Chopper in the tunnel would cause it to fly up and out of the player's sight. This behaviour was unintended, but I actually really liked the effect; it was as if the Chopper was trying to protect itself from the player by retreating. Therefore, I decided to script the Chopper's movements to make it truly retreat from the player.
I was unable to make this work by selecting the Chopper with its UID, so I instead opted to assign it an instance variable to govern its movement. While the instance variable was at a value of 1, upon spotting the player, the Chopper would initiate its scripted movement to the end of the valley.
Furthermore, I removed the second Chopper and added an additional AA Gun and SAM Site. I felt as though, with the upcoming tunnel run segment and the airbase raid, the layout was very saturated with Choppers. Choppers aren't strong enough of an enemy to carry the game on their own; they need to work in-tandem with other enemies. This is why I removed the second Chopper from this encounter and replaced it with extra ground enemies.


The final addition that I made to the game was an addition to the score system: multipliers. I added two more instance variables to Player: 'HighSpeedMultiplier' and 'FullHealthModifier'. Both of these values start off as 1, but when the criteria are met (exceeding the HighSpeed value and being at full health respectively), these values are set to higher amounts, 1.5 and 2.
The expression for applying points to score has been changed to: "(X)Points*HighSpeedMultiplier*FullHealthMultiplier". In Construct 3, asterisks are used to indicate multiplication; the base amount of points each enemy gives is multiplied by the value of the HighSpeedMultiplier, and the new value is multiplied by the value of the FullHealthMultiplier.

However, just inserting these multipliers wasn't enough; the player won't be able to interact with the mechanic if they don't know it's there, after all. Therefore, I decided to add a text asset called 'MultiplierDisplay' to the UI layer. As the name implies, MultiplierDisplay is designed to indicate when one of the above multipliers is active. Instead of using two separate text assets for the high speed multiplier and full health multiplier, I used to instances of the same asset and, through events, used UID selection to effect each instance separately.
If the conditions for the multiplier to activate are met, the opacity of the respective MultiplierDisplay instance will be set to 100; if they aren't, it will be set to 0. Thus, the display will not be visible until the multiplier is active.
I also decided to give each instance of the MultiplierDisplay instances unique colours in order to stand out, thus drawing the player's eye to the text and ensuring they will not miss the information it parts. The high speed MultiplierDisplay and full health MultiplierDisplay are coloured orange and red respectively. The transition from orange to red indicates a growing intensity, reflecting not only the difficulty of achieving these multipliers, but also the power of the multipliers.


There was one "enemy" that until this point, the player had not been rewarded for taking out: missiles. I added to the events that, upon the player's bullet hitting a missile or a missile entering a flare's line-of-sight, a value of 10 would be added to the player's score. On top of that, I added two more global variables: 'MissilesShotDown' and 'MissilesDeflected' respectively. Shooting down a missile or deflecting it with flares would add a value of 1 to their respective variables.
In the victory screen of the game, I have added two more text instances. These text instances display the value of MissilesShotDown and MissilesDeflected, showing the player how many missiles they took out with bullets and flares respectively.


Finally, there were some parts of the level design that I was unsatisfied with, which I have decided to change.
The first part of the level that I was unsatisfied with was the hill section after the first airbase. It didn't feel like a vital part of the level as much as it did padding, something to fill the time and give the player something to shoot at until they could reach the next big section. However, it ended up arguably even more boring due to the use of SAM Sites in this section. Missiles require the player's utmost focus to evade given their unmatched manoeuvrability, forcing them to halt their assault and go on the defensive. Unlike the previous section, where the player had to rapidly switch between offense and defence in order to come out victorious, the non-stop barrage of enemy missiles forces the player to stay on the defence indefinitely, halting progress in an unfun and boring way.

I decided to introduce the Chopper early, introducing the enemy in a less stressful environment and preparing the player for their later appearances (in hindsight, it wasn't the best idea to have the player learn how to fight a new enemy in an extremely tight chamber.) I overhauled the hill into another base, adding in Air Towers to add verticality to the segment as well as another Hangar.
I also extended the tunnel further. This wasn't so much to make the tunnel run itself harder, but instead to allow me to place the SAM Site in the next section closer to the next batch of enemies while still maintaining cover. I also moved the AA Gun in this section closer to the Pillbox. I believe that the SAM placement in this section works because unlike the previous rendition of the hilltop encounter, where the SAM only forces the player away, the SAM can only fire and be fired upon from the right due to its hill cover. Therefore, the player is allowed to dive into the heart of the battle, where they not only have to focus on guiding AA fire, but also ensure they are in a good position to defeat enemy missiles.
